안드로이드 프로그래밍 5주차
안드로이드 프로그래밍 5주차
수업 내용
- 버튼의 활성 및 비활성화
- 버튼의 선택 가능 여부
- 버튼의 회전
- 텍스트박스의 값을 알림으로 출력하기
- 필자는 모든 예제를 checkbox와 버튼을 이용하여 구현하였다
버튼의 활성 및 비활성화
- 활성화 여부는 버튼명.setEnabled();를 이용해 설정할 수 있다
- setEnabled에 true나 false를 넣어 활성화 여부를 결정할 수 있다
- 사용한 코드
1
2
3
4
5
6
7
8
9
10
11
12
13
14
15
16
17
18
19
<!-- activity_main.xml -->

<?xml version="1.0" encoding="utf-8"?>
<LinearLayout xmlns:android="http://schemas.android.com/apk/res/android"
    xmlns:app="http://schemas.android.com/apk/res-auto"
    xmlns:tools="http://schemas.android.com/tools"
    android:layout_width="match_parent"
    android:layout_height="match_parent"
    tools:context=".MainActivity"
    android:orientation="vertical">

    <CheckBox
        android:id="@+id/checkBox1"
        android:layout_width="wrap_content"
        android:layout_height="wrap_content"
        android:checked="true"
        android:text="Enabled 속성"
        android:textSize="30sp"/>
  </LinearLayout>
- checkBox를 생성할 때 android:checked를 이용하면 체크박스에 체크 여부를 설정할 수 있다
- android:checked에는 true나 false를 넣어 기본값을 지정할 수 있다
1
2
3
4
5
6
7
8
9
10
11
12
13
14
15
16
17
18
19
20
21
22
23
24
25
26
27
28
29
30
31
32
33
34
35
36
37
38
39
//MainActivity.java
package com.example.rotation_5nd_20214135;

import androidx.appcompat.app.AppCompatActivity;

import android.os.Bundle;
import android.view.KeyEvent;
import android.view.View;
import android.widget.Button;
import android.widget.CheckBox;
import android.widget.CompoundButton;
import android.widget.EditText;
import android.widget.Toast;

public class MainActivity extends AppCompatActivity {
    CheckBox cb1;
    Button btn1;

    @Override
    protected void onCreate(Bundle savedInstanceState) {
        super.onCreate(savedInstanceState);
        setContentView(R.layout.activity_main);

        cb1 = (CheckBox)findViewById(R.id.checkBox1);
        btn1 = (Button) findViewById(R.id.btn1);

        //활성/비활성 체크를 변경하면 수행 문 실행
        cb1.setOnCheckedChangeListener(new CompoundButton.OnCheckedChangeListener() {
            @Override
            public void onCheckedChanged(CompoundButton buttonView, boolean isChecked) {
                //체크 여부 확인
                if(isChecked)
                    btn1.setEnabled(true); //활성화 처리
                else
                    btn1.setEnabled(false); //비활성화 처리
            }
        });
    } //onCreate
} //MainActivity
버튼 활성화
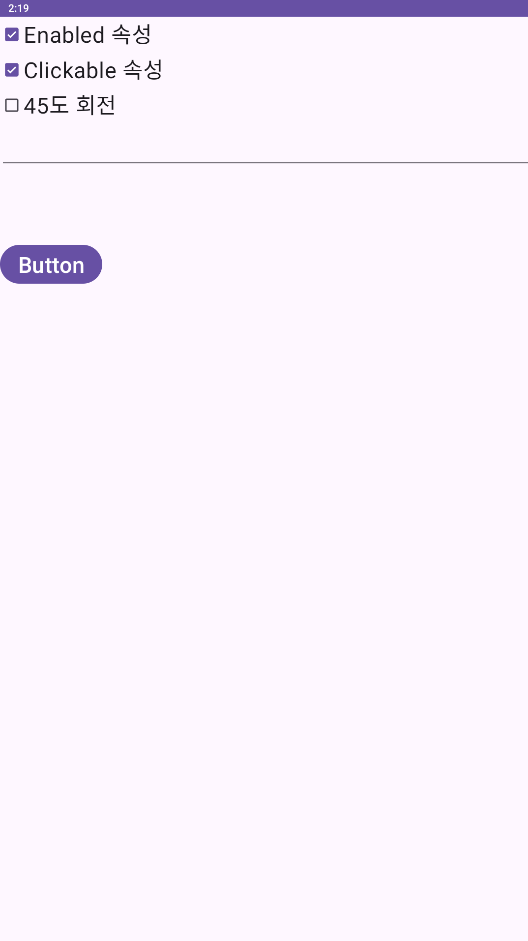
- 체크 박스를 선택하여 오브젝트가 활성화 될 경우 보라색(기본값)으로 바뀌며 선택이 가능하다
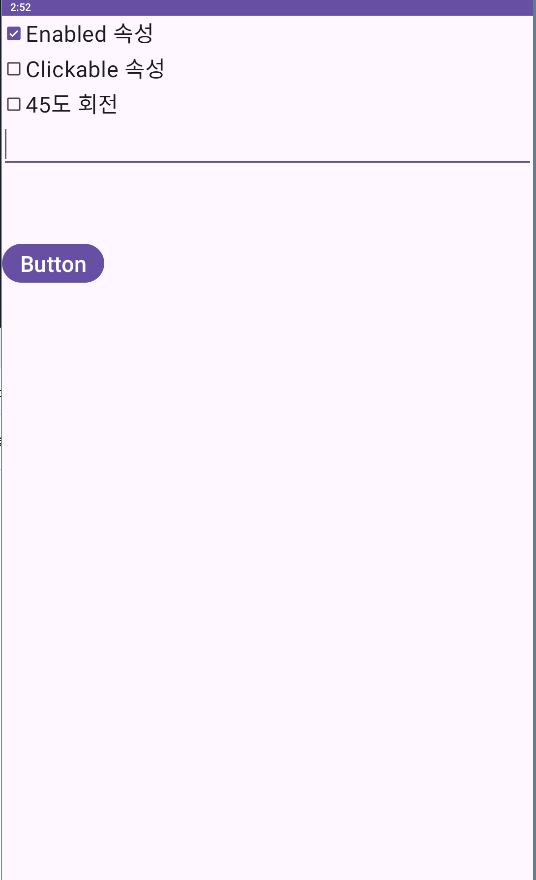
버튼 비활성화

- 체크 박스를 선택하여 오브젝트가 비활성화 될 경우 회색으로 바뀌며 선택이 불가늫하다
오브젝트의 선택 가능 여부
예시 프로그램에서는 체크박스의 선택 여부에 따라 버튼이 선택 가능 여부가 변경되게 구현하였다
- 오브젝트의 선택 가능 여부는 오브젝트명.setClickable();를 이용해 설정이 가능하다
- setClickable에 true나 false를 넣어 활성화 여부를 결정할 수 있다
- 오브젝트 선택이 불가능하게 설정할 경우, 비활성화 되었을 때와 다르게 색상은 바뀌지 않지만 선택이 불가능해진다
사용한 코드
1
2
3
4
5
6
7
8
9
10
11
12
13
14
15
16
17
18
19
<!-- activity_main.xml -->

<?xml version="1.0" encoding="utf-8"?>
<LinearLayout xmlns:android="http://schemas.android.com/apk/res/android"
    xmlns:app="http://schemas.android.com/apk/res-auto"
    xmlns:tools="http://schemas.android.com/tools"
    android:layout_width="match_parent"
    android:layout_height="match_parent"
    tools:context=".MainActivity"
    android:orientation="vertical">

    <CheckBox
        android:id="@+id/checkBox2"
        android:layout_width="wrap_content"
        android:layout_height="wrap_content"
        android:checked="true"
        android:text="Clickable 속성"
        android:textSize="30sp"/>
  </LinearLayout>
1
2
3
4
5
6
7
8
9
10
11
12
13
14
15
16
17
18
19
20
21
22
23
24
25
26
27
28
29
30
31
32
33
34
35
36
37
38
//MainActivity.java
package com.example.rotation_5nd_20214135;

import androidx.appcompat.app.AppCompatActivity;

import android.os.Bundle;
import android.view.KeyEvent;
import android.view.View;
import android.widget.Button;
import android.widget.CheckBox;
import android.widget.CompoundButton;
import android.widget.EditText;
import android.widget.Toast;

public class MainActivity extends AppCompatActivity {
    CheckBox cb2;
    Button btn1;

    @Override
    protected void onCreate(Bundle savedInstanceState) {
        super.onCreate(savedInstanceState);
        setContentView(R.layout.activity_main);

        cb2 = (CheckBox)findViewById(R.id.checkBox2);
        btn1 = (Button) findViewById(R.id.btn1);

        //선택 가능 체크를 변경하면 수행 문 실행
        cb2.setOnCheckedChangeListener(new CompoundButton.OnCheckedChangeListener() {
            @Override
            public void onCheckedChanged(CompoundButton buttonView, boolean isChecked) {
                if(isChecked)
                    btn1.setClickable(true); //활성화 처리
                else
                    btn1.setClickable(false); //비활성화 처리
            }
        });
    } //onCreate
} //MainActivity
예시 프로그램에서의 작동 모습
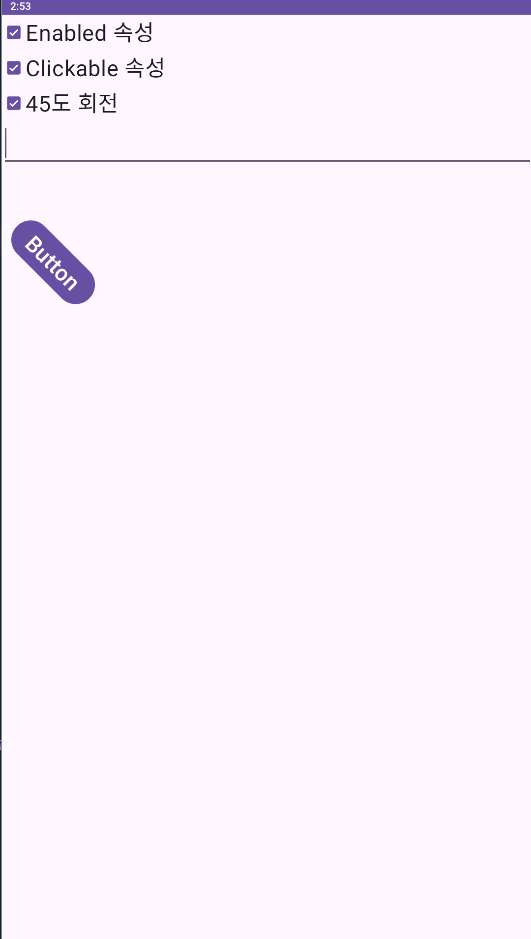
오브젝트의 회전
- 오브젝트의 회전은 오브젝트명.setRotation(각도);를 이용해 구현이 가능하다
- 예시 프로그램에서는 체크박스의 선택 여부에 따라 45도와 0도로 구현하였다
사용한 코드
1
2
3
4
5
6
7
8
9
10
11
12
13
14
15
16
17
18
<!-- activity_main.xml -->
<?xml version="1.0" encoding="utf-8"?>
<LinearLayout xmlns:android="http://schemas.android.com/apk/res/android"
    xmlns:app="http://schemas.android.com/apk/res-auto"
    xmlns:tools="http://schemas.android.com/tools"
    android:layout_width="match_parent"
    android:layout_height="match_parent"
    tools:context=".MainActivity"
    android:orientation="vertical">

    <Button
        android:id="@+id/btn1"
        android:layout_width="wrap_content"
        android:layout_height="wrap_content"
        android:text = "Button"
        android:textSize="30sp"
        android:layout_marginTop="100dp"/>
</LinearLayout>
1
2
3
4
5
6
7
8
9
10
11
12
13
14
15
16
17
18
19
20
21
22
23
24
25
26
27
28
29
30
31
32
33
34
35
36
37
//MainActivity.java
package com.example.rotation_5nd_20214135;

import androidx.appcompat.app.AppCompatActivity;

import android.os.Bundle;
import android.view.KeyEvent;
import android.view.View;
import android.widget.Button;
import android.widget.CheckBox;
import android.widget.CompoundButton;
import android.widget.EditText;
import android.widget.Toast;

public class MainActivity extends AppCompatActivity {
    CheckBox cb3;
    Button btn1;

    @Override
    protected void onCreate(Bundle savedInstanceState) {
        super.onCreate(savedInstanceState);
        setContentView(R.layout.activity_main);

        cb3 = (CheckBox)findViewById(R.id.checkBox3);
        btn1 = (Button) findViewById(R.id.btn1);

        cb3.setOnCheckedChangeListener(new CompoundButton.OnCheckedChangeListener() {
            @Override
            public void onCheckedChanged(CompoundButton buttonView, boolean isChecked) {
                if(isChecked)
                    btn1.setRotation(45); //45도 회전
                else
                    btn1.setRotation(0); //비활성화 처리
            }
        });
    } //onCreate
} //MainActivity
예시 프로그램에서의 작동 모습
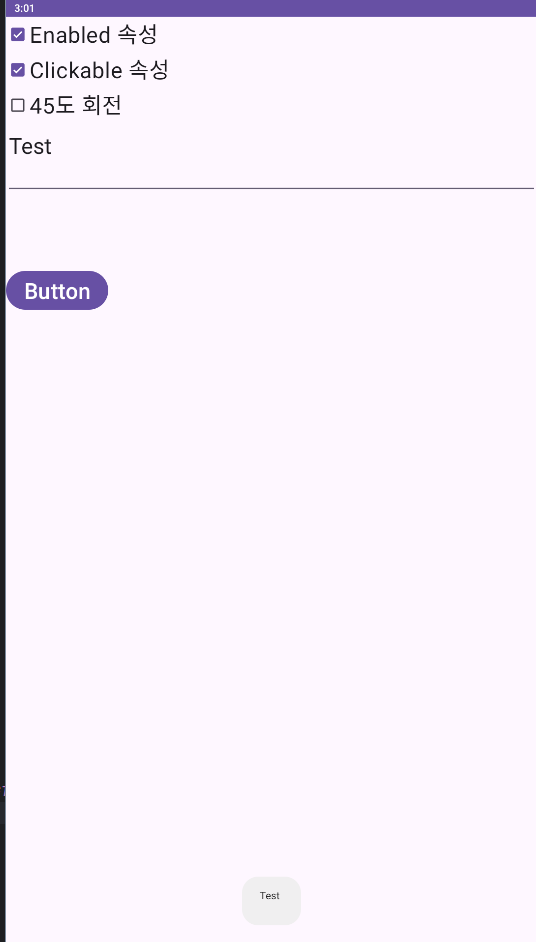
텍스트박스의 값을 알림으로 출력하기
- 예시 프로그램에서는 키보드에서 손을 떼었을 경우 입력한 메시지가 알림으로 출력된다
- 예시 프로그램에서는 ACTION_UP를 사용하였지만 ACTION_DOWN등도 사용 가능하다
사용한 코드
1
2
3
4
5
6
7
8
9
10
11
12
13
14
15
16
<!-- activity_main.xml -->
<?xml version="1.0" encoding="utf-8"?>
<LinearLayout xmlns:android="http://schemas.android.com/apk/res/android"
    xmlns:app="http://schemas.android.com/apk/res-auto"
    xmlns:tools="http://schemas.android.com/tools"
    android:layout_width="match_parent"
    android:layout_height="match_parent"
    tools:context=".MainActivity"
    android:orientation="vertical">

    <EditText
        android:id="@+id/edtText1"
        android:layout_width="match_parent"
        android:layout_height="wrap_content"
        android:textSize="30sp"/>
</LinearLayout>
1
2
3
4
5
6
7
8
9
10
11
12
13
14
15
16
17
18
19
20
21
22
23
24
25
26
27
28
29
30
31
32
33
34
//MainActivity.java
package com.example.rotation_5nd_20214135;

import androidx.appcompat.app.AppCompatActivity;

import android.os.Bundle;
import android.view.KeyEvent;
import android.view.View;
import android.widget.Button;
import android.widget.CheckBox;
import android.widget.CompoundButton;
import android.widget.EditText;
import android.widget.Toast;

public class MainActivity extends AppCompatActivity {
    EditText edtText1;

    @Override
    protected void onCreate(Bundle savedInstanceState) {
        super.onCreate(savedInstanceState);
        setContentView(R.layout.activity_main);

        edtText1 = (EditText) findViewById(R.id.edtText1);
        edtText1.setOnKeyListener(new View.OnKeyListener() {
            @Override
            public boolean onKey(View v, int keyCode, KeyEvent event) {
                if(event.getAction() == KeyEvent.ACTION_UP)
                    Toast.makeText(getApplicationContext(), edtText1.getText().toString(), Toast.LENGTH_SHORT).show();

                return false;
            }
        });
    } //onCreate
} //MainActivity
예시 프로그램에서의 작동 모습
이 기사는 저작권자의 CC BY 4.0 라이센스를 따릅니다.